A Guide To Sizing Your Embroidery and Screen Printing Art
First understand that setups do not change size, putting together the screen stencils for printing or digitizing the art for embroidery is done to a static dimension. Making changes to these requires an entire new set up.
That’s why we recommend that you consider the mode of your size run when thinking about graphic size. So for example if your order looks something like S-10 M-15 L-20 XL-10 XXL-5 on unisex tees then you’re going to want to size your art to the Medium/Large sizes. Now say you want to print some ladies tees with the same setups. If that’s the case then you may want to consider sizing the art down but note that the print field on ladies XS is about a third of that on mens XXL.
Use the print area wisley, bigger isn’t always better.
Another thing to think about is width height ratio, we recommend that you design around a 3:2 ratio (a third wider than tall) for front prints and 2:3 for back prints. This will allow you to take advantage of the optimum print field or simply speaking the ideal print placement.

We have a 15in X 18in print size maximum on our standard setups. On the larger size a full front or back print on unisex tees would be roughly 12 in wide and 13 in tall. Keep in mind that garments are not flat when they are on a body so going too wide puts your graphic out of the optimal print field and into the under arm area, particularly on smaller sizes.
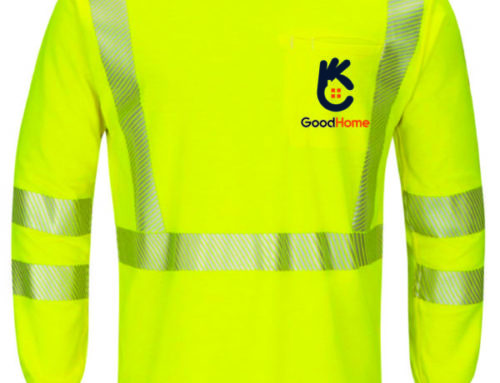
Try and use shirt color in your art.
Let’s also consider print size in terms of functionality, very large print fields are fine if you are using water base but with plastisol you can run into issues with breathability particularly on thinner fabrics. A great way to get around this is use shirt color in your graphic, this will break up the print field and save you some costs on printing by shaving off a color.
Below are some scale diagrams to help assist your imagination. These are based off a size large shirt for mens and medium for womens, the most common sizes in said gender. Because everything starts centered we like to measure from the center out for width (for example 6 inches out on either side is 12 in wide). Left chest prints are always located centered under the out most part of the collar.

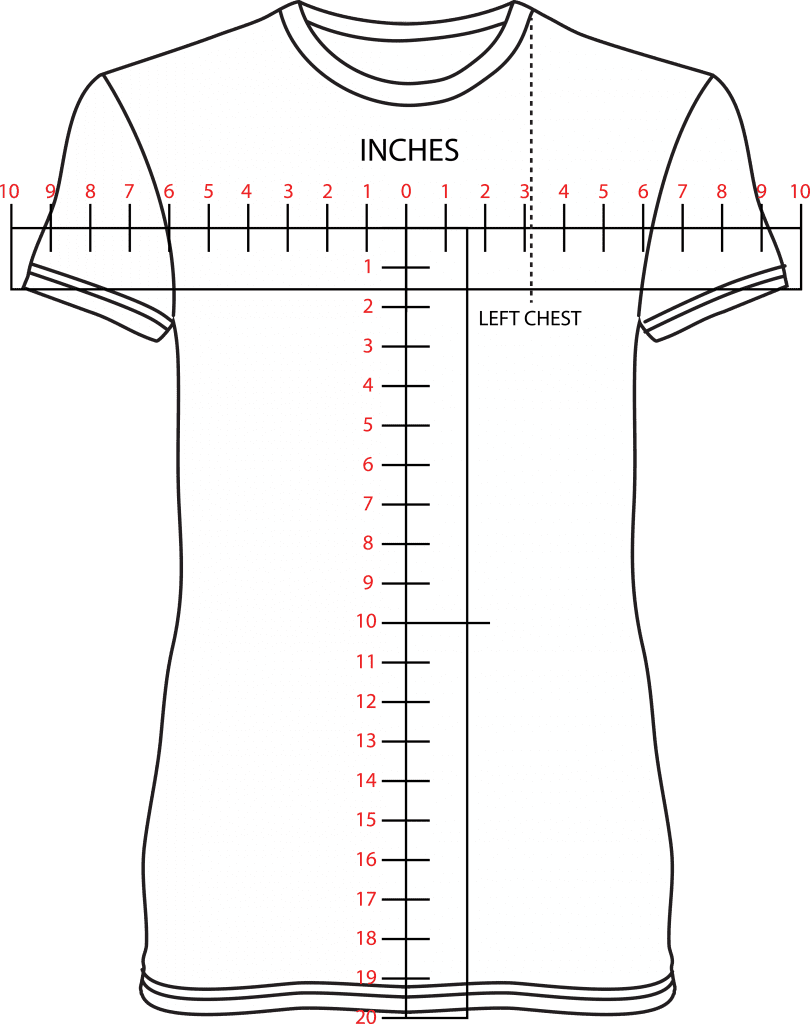
As a rule of thumb, the optimum print field in comparison to mens unisex is 2 inches narrower on ladies and 4 inches on youth. We determine the distance from the collar to the top of the print as well as the location of the left chest for you and move them appropriately as the sizes change unless asked to do otherwise.
The best practices when sizing headwear art.
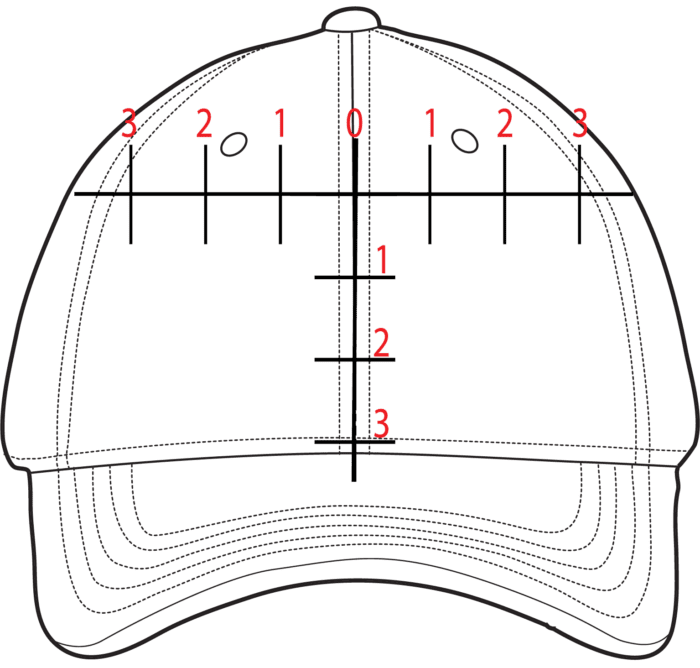
Let’s move onto sizing your art on headwear. We advise against using art that is taller than it is wide and recommend a 2:1 ratio here. The optimal image field on hats is 4in X 2in, so consider the amount of detail your packing into that space. You want your art to be legible from 6ft away so bold details are best. Like anything there are ways to stretch the limitations but start at best case scenario if you can.
Here is a size scale diagram for hats, a good practice when considering what size your art should be is to print it out on your desk jet printer and hold it up to your favorite hat. Again keep in mind that hats are contour so pushing your art out past the optimal print dimensions isn’t recommended.
It’s important to remember that people are moving objects and the purpose of embellishing garments is to send a message or identity to others. Make your art bold and put it where people can see it. The metrics for social space are 4ft to 12ft and 12ft + for public space so printing anything that can’t be easily discerned form that distance seems a little pointless don’t you think? Design at the size you would like your art printed or embroidered and consider all the things we talked about here for a successful project.
Thanks for reading!


